

Want to edit pictures on your Mac? Learn how to edit pictures on your Mac in this guide.
Looking to edit pictures on your Mac? Want to enhance the quality of your pictures that didn’t turn out the way you expected them to be? Don’t worry, you can easily edit pictures on your Mac using the built-in Photos app.
All Macs feature the Photos app which is primarily a way to view your pictures, but you can also use the same to edit. It is easy and free to use, so what are you waiting for, choose an image and fiddle with it to see if you can improve it.
By the end of this article, you will know how to edit pictures on your Mac. Remember, this is a guide for beginners and casual users.
Related: Best Video Editing Software for Mac
How to Edit Pictures on your Mac
How to edit pictures on your Mac with the Photos app
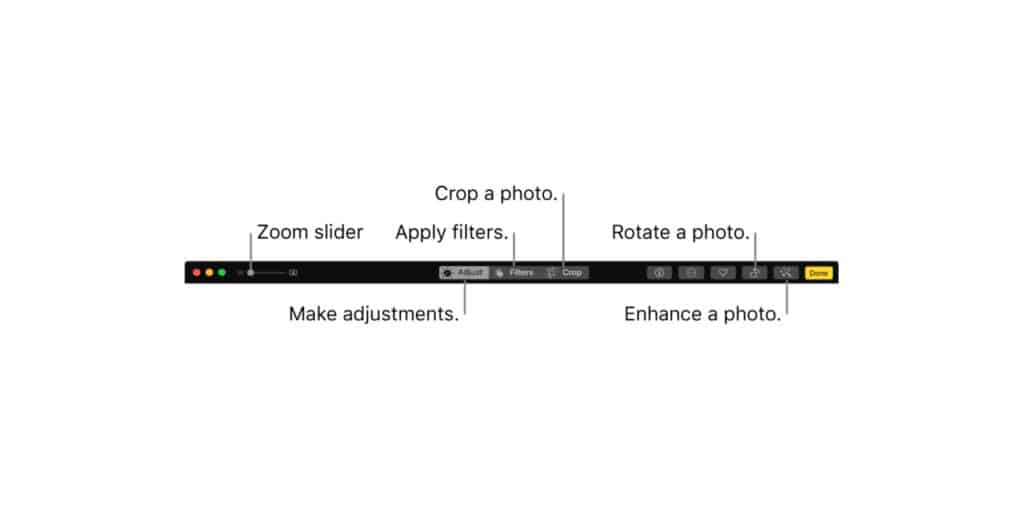
The Photos app on every Mac is a built-in picture viewer and editor. The app is easy to use and intuitively designed so that anyone can edit pictures at a beginner's level. You can resize, crop, and adjust image parameters like brightness, color saturation, and more. It is perfect for casual users. I will explain in detail with steps on how to edit each parameter and feature below.
Crop and Straighten Pictures on your Mac
The Photos app for Mac gives you the option to crop and straighten pictures either automatically or manually. Follow the respective steps for each method:
How to Automatically Crop and Straighten Pictures
Step 1 Launch the Photos app on your device.
Step 2 Now choose the picture that you want to edit.
Step 3 Click the Edit button found in the navigation panel at the top.

Step 4 Now, click on the Crop option in the navigation panel at the top.
Step 5 Now choose the Auto option at the bottom right of your screen.
Step 6 Click Done at the upper right corner of your screen.
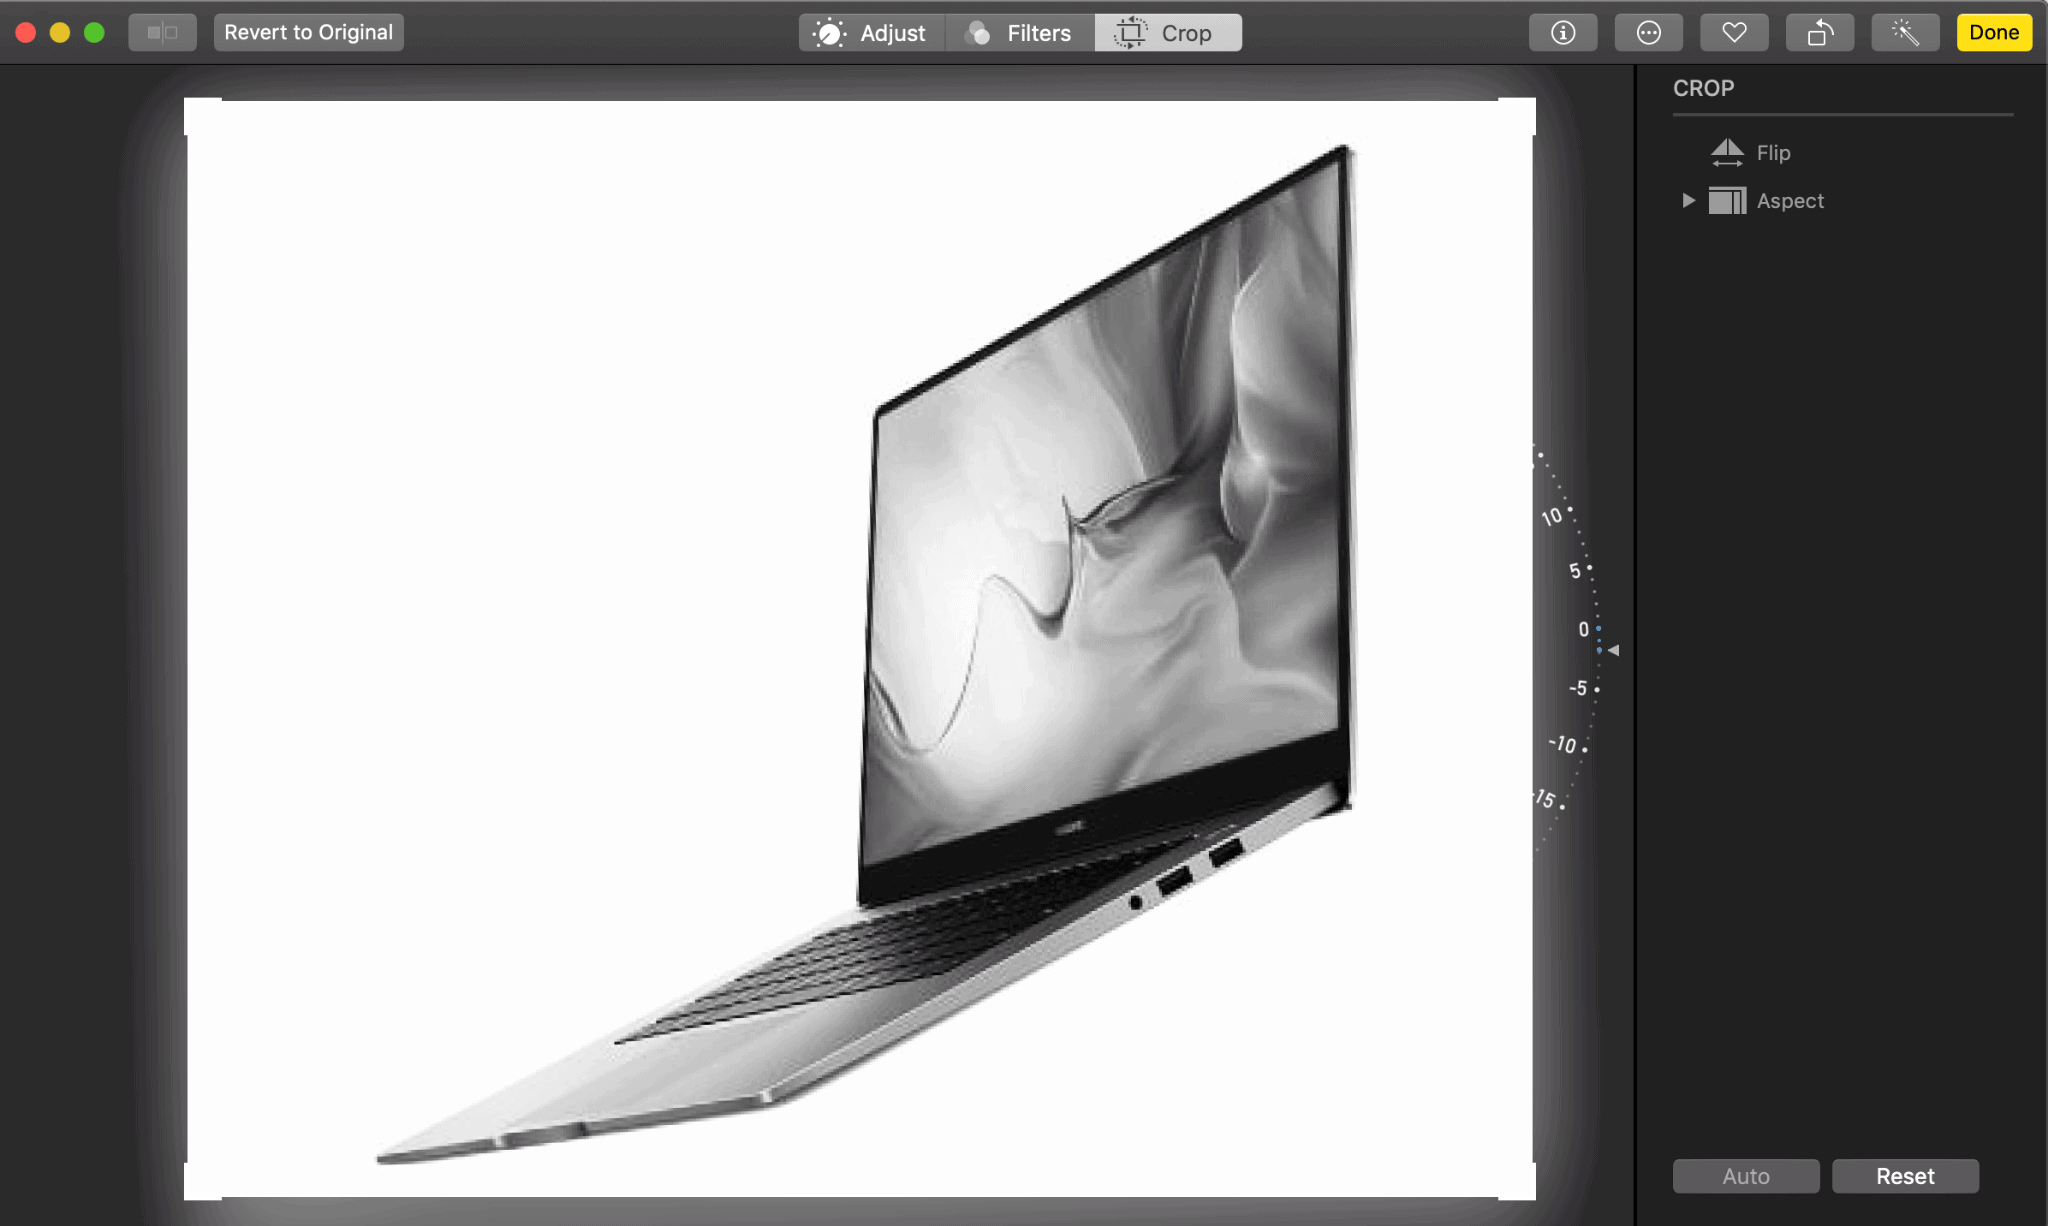
How to Manually Crop Pictures on your Mac
Follow Step 1 to Step 4 from How to Automatically Crop and Straighten Pictures and then click on the arrow next to Aspect on the right side of the screen.
Now choose the aspect ratio you prefer, or you can adjust the picture by grabbing the corner and moving around. You can also create a custom aspect ratio if needed. Once you have cropped the image, click Done in the upper right corner of your screen.
How to Manually Straighten Pictures on your Mac
Follow Steps 1 to 4 from How to Automatically Crop and Straighten Pictures. Now, click on the dial and drag it up and down to adjust the straightness of your picture. Once you are done adjusting, click on Done in the upper right corner.
How to Rotate and Flip Pictures on your Mac
The Photos app on your Mac allows you to rotate and flip pictures if needed. Follow the respective steps to rotate or flip pictures,
How to Rotate Pictures on your Mac
Step 1 Open the Photos app and choose the picture you want to rotate.
Step 2 From the menu bar, click on Image.
Step 3 Now click on Rotate Counterclockwise (or Clockwise) to rotate the image by 90 degrees.
You can rotate pictures by using keyboard shortcuts too, press Command+R for Counterclockwise rotation or Option+Command+R for Clockwise rotation.
How to Flip (Mirror) Pictures on your Mac
Step 1 Launch the Photos app and choose the picture you want to Flip.
Step 2 Click on the Image option from the menu bar.
Step 3 Click Flip Horizontal (or Vertical) from the menu to mirror your picture.
How to Adjust the Brightness, Color Saturation, and White Balance of Pictures on your Mac
Step 1 Launch the Photos app and now choose the picture you want to edit.
Step 2 Click the Edit option from the top navigation panel.

Step 3 Click on the Light, Color, or White to adjust brightness, color saturation, and white balance respectively.
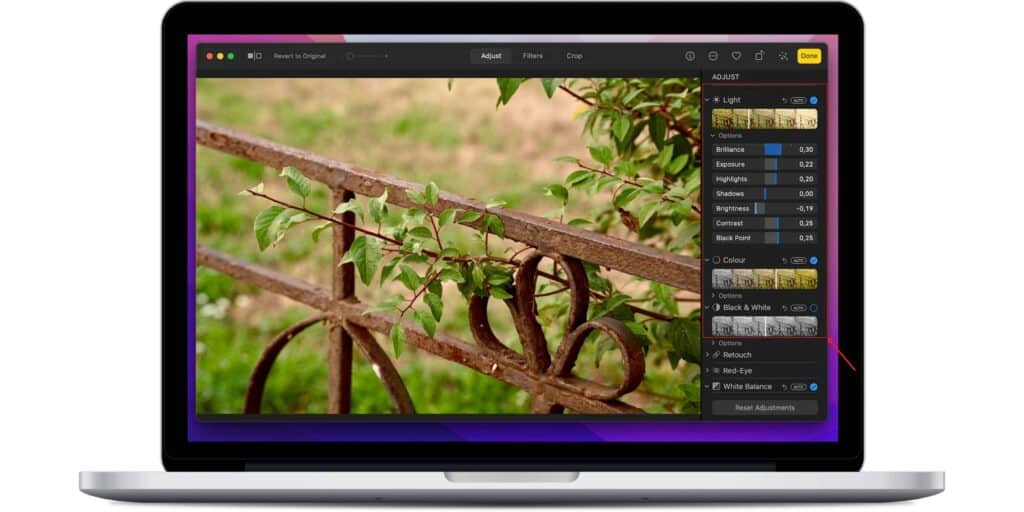
Step 4 Move the sliders to adjust the above parameters depending on your looking.
Step 5 Click Done when you are satisfied with your adjustments.
How to Adjust Definition, Reduce Noise, and Vignette of a Picture on your Mac
The Photos app allows you to adjust the above parameters for a picture. These parameters enhance your picture by improving detail, reducing noise artifacts, and add a fading effect. To adjust these, follow the steps below,
Step 1 Open the Photos app on your Mac and choose the picture you want to edit.
Step 2 Click the Edit button in the navigation panel at the top.

Step 3 Click the arrows next to Definition, Noise Reduction, or Vignette depending on what you need to adjust.

Step 4 Drag the respective sliders to adjust the parameters to your liking.
Step 5 Once, you have adjusted, Click on Done.
How to Retouch a Picture on your Mac
The Retouch tool of the Photos app on your Mac lets you remove imperfections like blemishes or foreign objects in your pictures. It is not as robust as spot healing tools from photoshop and more but still might work wonders for you. To use the Retouch tool, follow these steps,
Step 1 Launch the Photos app on your mac and choose the picture that you want to retouch.
Step 2 Click on the Edit button in the navigation panel at the top.

Step 3 Click on the arrow next to the Retouch option on the Right.
Step 5 Drag the slider to increase or decrease the size of the Retouch tool.
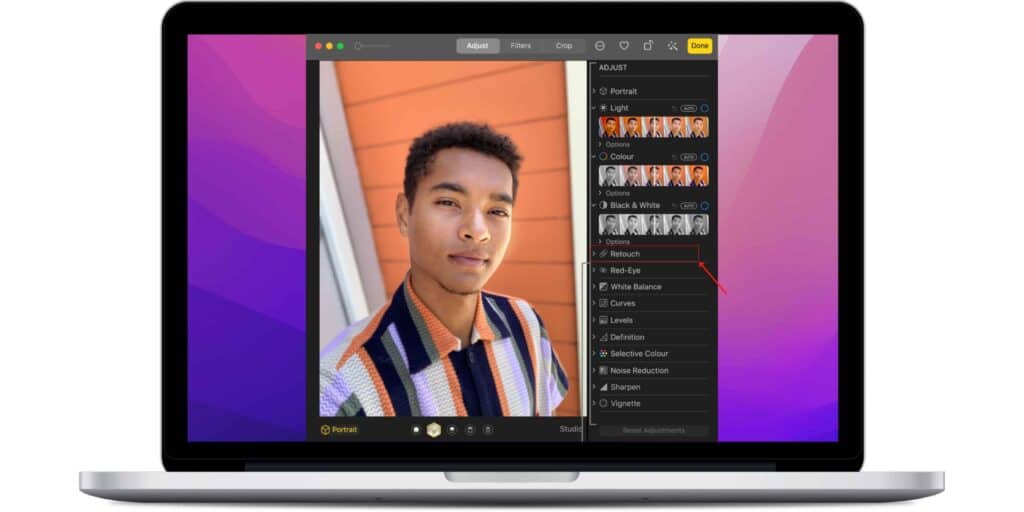
Step 6 Click and drag the Retouch tool on the areas of the pictures that need to be fixed.
Step 7 Once you are happy with the results, click Done.
There is also an option for you to use the Option key and click to select a pattern to retouch. And you can Undo a retouch by pressing Command+Z on your keyboard.
Correct Red-Eye on your Mac
To correct the Red-Eye effect on your pictures, follow these steps on your Mac,
Step 1 Open the Photos app on your Mac and choose the picture that needs Red-Eye correction.
Step 2 Click on the Edit option.

Step 3 Choose the Red-Eye option from the sidebar.
Step 4 Adjust the size of the brush with the slider and then click on the brush.
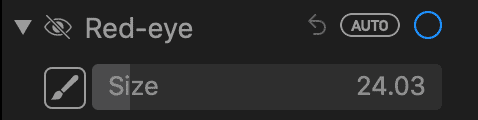
Step 5 Click on the eye that needs to be corrected.
Step 6 Once it is fixed, tap on Done.
How to Adjust the Sharpness of Pictures on your Mac
Sharpness is the clarity of detail in a picture, you can adjust this by following the below steps,
Step 1 Launch the Photos app and then double-click the picture you want to adjust sharpness.
Step 2 Click the Edit button from the navigation panel.

Step 3 Now, click the arrow beside the Sharpen option.
Step 4 Here, you can drag the sliders to adjust Intensity, Edges, and Falloff, all these affect the overall sharpness of your picture.
Step 5 Once you have completed adjusting, click on Done.
How to Use Selective Color on your Mac
Selective color is a feature that allows you to precisely adjust color settings like Hue, Saturation, Luminance, and more. To use the Selective Color feature, follow these steps,
Step 1 Launch the Photos app and double-click on the picture you want to adjust.
Step 2 Click on the Edit option.

Step 3 Click on the Selective Color option from the sidebar.
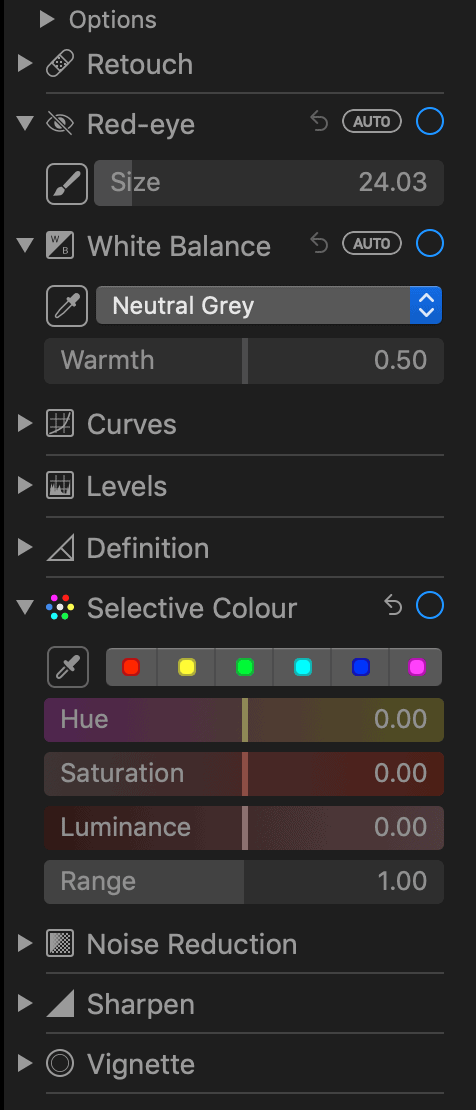
Step 4 Adjust the respective sliders to adjust the picture to your liking.
Step 5 Click on Done from the top right corner once you are done adjusting.
How to Add Filters to a Picture on your Mac
The Photos app on Macs uses the same filters that you find on iPhones and iPads. These filters can be used to make a poor picture look better. Filters are also non-destructive, which means you can remove them if you change your mind. To add filters to a picture on your Mac, follow these steps,
Step 1 Open the Photos app and choose the picture to which you want to add filters.
Step 2 Click on the Edit button.

Step 3 Now choose the Filters option from the top navigation.
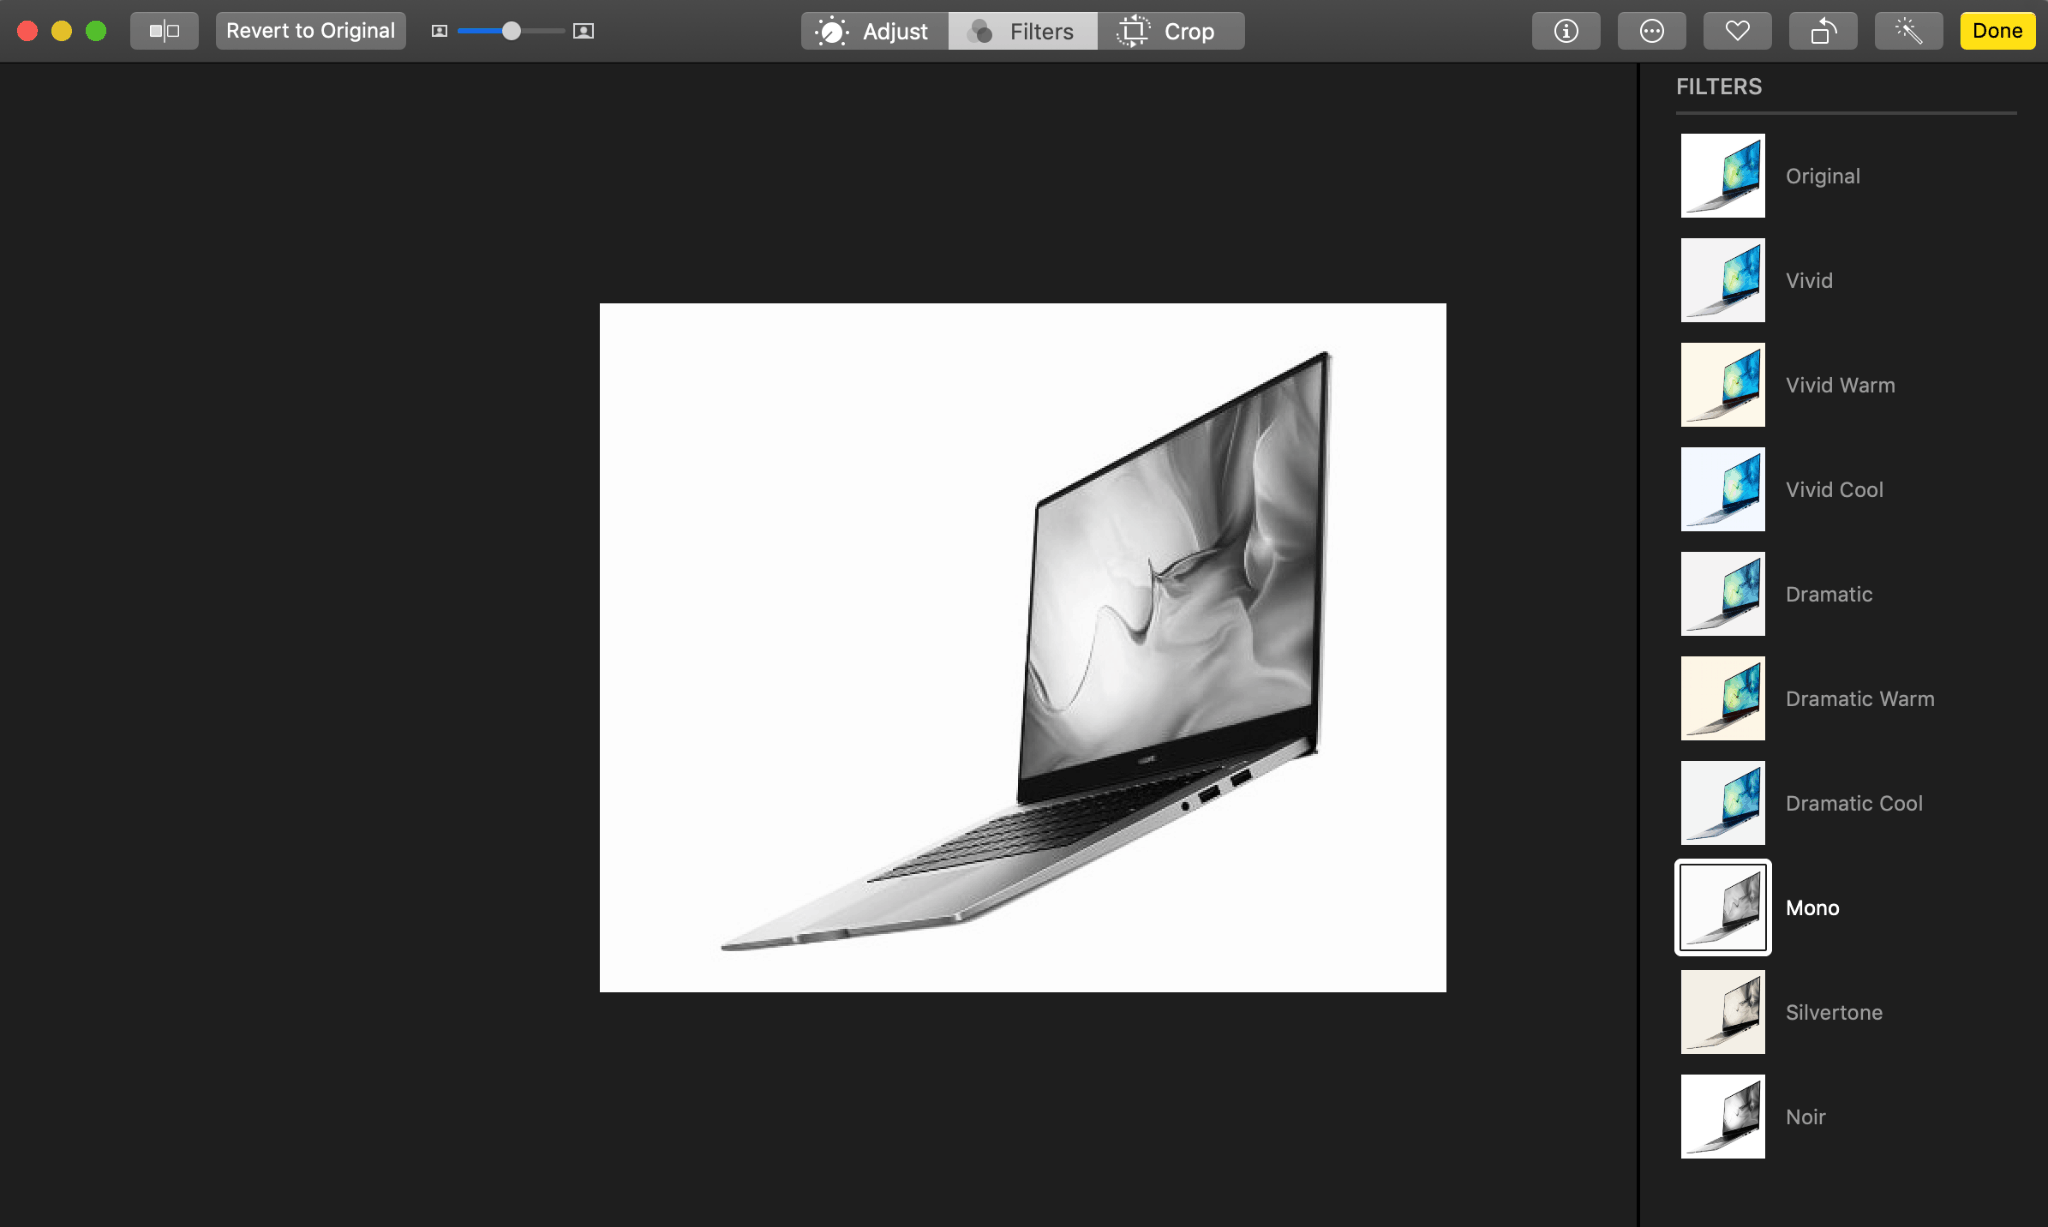
Step 4 Click the Filter that you want to apply to the picture.
Step 5 When you find a filter that suits your picture, click on Done.
How to Edit Pictures on your Mac - Other Apps
As good as the Photos app is, it is not professional software and so it lacks many features that professionals would want. Apps like Adobe Photoshop, Adobe Lightroom, Affinity, Luminar and more are suited for professionals that need to edit pictures on a professional level.
These apps offer layers, and tools that are specialized to create the best images possible but they also cost a lot of money and have a steep learning curve.
That is why I recommend the included Photos app on your Mac if you are a beginner or a casual user that is looking to enhance your pictures. The Photos app is great for casual users that don't want to learn professional software or spend money on such software.
How to Edit Pictures on your Mac - Conclusion
So, there you have it, editing pictures on your Mac is as easy as that. The Photos app is excellent if you want a quick edit to be done on your images. It can enhance any picture you have and is simple for anyone to get grips it.
Pick a picture and start experimenting with it, you will be an expert with the Photos app in no time. We hope this guide on How to Edit Pictures on your Mac was helpful. Let us know if you have any doubts in the comments below.
Also Check:


Leave a comment
This site is protected by reCAPTCHA and the Google Privacy Policy and Terms of Service apply.